In the last few years, Graph started to dominate on accessing/managing various products across Microsoft cloud platforms. We are starting with a series of posts related with Graph API and various techniques for IT Administrators, which could be helpful on the day today operations.
Filtering User Objects
Filter based on DisplayName
Get-MgUser -Filter "Displayname eq 'Abba'"

Filter based on Email address
Get-MgUser -Filter "mail eq 'thomas@decodingcloud.in'"

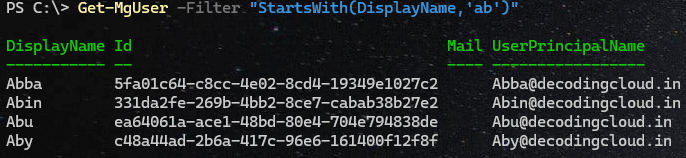
Filter based on starting pattern
Get-MgUser -Filter "StartsWith(DisplayName,'ab')"
Filter based on an attribute not equal to a specific value
Get-MgUser -Filter "displayname ne 'abba'" -ConsistencyLevel eventual -CountVariable CountVa
Note - The operator 'ne' falls under Advanced Query, Hence ConsistencyLevel and CountVariable are required.
Note - Note all properties are supported for advanced queries. Refer the official documentation for understanding the supported attributes.

Filter based on an attribute ending with a specific value
Get-MgUser -Filter "endswith(UserPrincipalName,'decodingcloud.in')" -ConsistencyLevel eventual -CountVariable Count
Note - Note all properties are supported for advanced queries. Refer the official documentation for understanding the supported attributes.

These MG cmdlets are to read objects based on certain conditions from Entra ID. I have included sample queries which are available by default and advanced queries which needs additional consideration. The thumb rule to understand is for query operations, It depends on
1) Understanding if the operator supports filtering based on the specific property we are trying to filter
2) Understanding if the filtering falls under an advanced filtering capability
And for Entra ID, this changes based on each object category.
Lets discuss more on advanced queries on the next blog post.