Data Migration using Mover
By this time, We are ready with the below on the target tenant
- User Objects
- Teams
- Teams Channels including Private Channels
- M365 Groups
- Standalone SharePoint Sites
Mover is a tool which can move the data from one SharePoint site to another SharePoint site. That means, We need to have both SharePoint sites available prior to the data movement. That’s the logic behind sequencing the activities on target tenant so that all SharePoint sites, part of different services are getting created first without data.
How mover identify the source and target?
Mover has two options to add source/target pairs to migration console.
- Auto Discovery
- Manual CSV
Navigate to Migration Manager drop down menu and click on “Add to Migration”
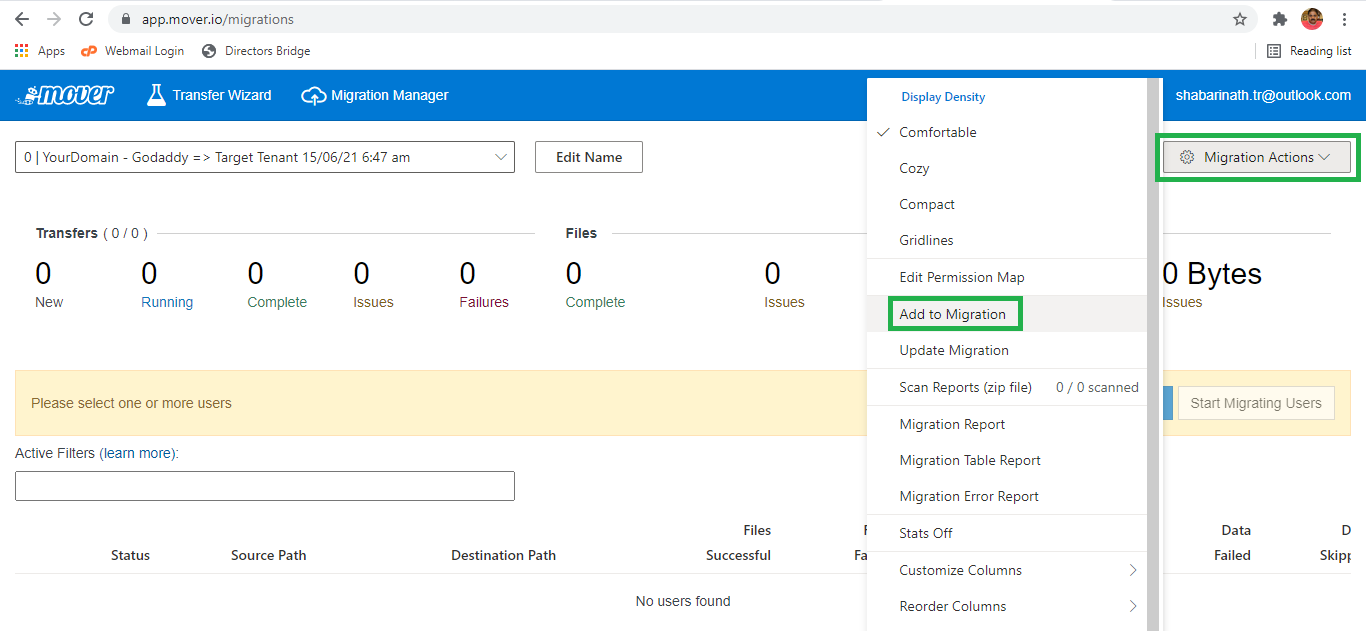
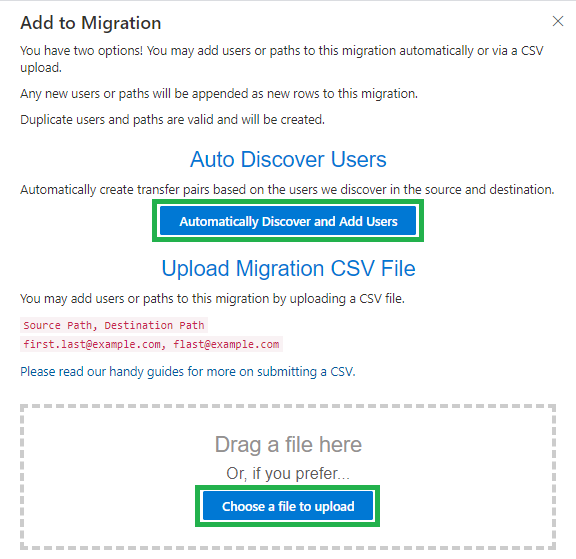
Add to Migration page will have both options listed.

In my experience, CSV upload is best so that we control the source and destination. The input file needs to be carefully made.
Guiding Principal on preparing an Input File
I am not a SharePoint expert to give a detailed writeup. However, I can help with the areas I am confident about.
- Start with listing down the SharePoint sites into different categories
- M365 Groups / Teams related SharePoint sites can be identified using the below one-liner
- Get-SPOSite -Limit All -Template GROUP#0 |Select @{Label=”SharedDocumentsURL”; Expression={$_.URL+”/Shared Documents”}}
OR - Get-UnifiedGroup -ResultSize unlimited |Select SharePointDocumentsUrl
- Get-SPOSite -Limit All -Template GROUP#0 |Select @{Label=”SharedDocumentsURL”; Expression={$_.URL+”/Shared Documents”}}
- M365 Groups / Teams related SharePoint sites can be identified using the below one-liner
- Teams Private Channels will have a dedicated SharePoint site which can be identified using the below one-liner
- Get-SPOSite -Limit All -Template TEAMCHANNEL#0 |Select @{Label=”SharedDocumentsURL”; Expression={$_.URL+”/Shared Documents”}}
- SharePoint standalone sites which is not integrated with Teams or M365 groups can be listed using the below oneliner
- Get-SPOSite -Template SITEPAGEPUBLISHING#0 |Select @{Label=”SharedDocumentsURL”; Expression={$_.URL+”/Shared Documents”}}
- OneDrive for business URLs can be identified from the below commandletGet-SPOSite -Limit All -IncludePersonalSite $true -Template SPSPERS#10
- For OneDrive, Mover input file needs the UPN. for example Input File should have source as /shabarinath@activedirectory.in and destination as /shabarinath@activedirectoryin.onmicrosoft.com
Export the URL list for Source and Destination on each category
Use | select URL, Owner, Title to have a better visibility before exporting to CSV
Use |Export-Csv to export the details to CSV
By now, We have SharePoint URLs of both source tenant and target tenant with URL details. The next step is to do a manual matching between source and destination. Except OneDrive URLs, all URLs should be pointed to the document library. The one-liners are adjusting the URLs by appending “/Shared Documents” at the end. This is just based on an assumption and hence all the URLs needs to be validated by opening them.
Another important point is matching the URLs in source and destination. Teams/Teams Channels can be renamed after creation. However, the SharePoint sites will remain with the original name used at the time of creation. So there is a chance that URLs in source tenant may not match with the destination if we do a straight comparison. This is happening because the teams/teams channels are getting created on the target tenant based on the current teams/teams channels. Hence, the SharePoint URLs will be based on the current Teams/Teams Channel display names. And we cannot use other attributes like mail nick name which will retain the original name, as users are only aware of the Teams/Teams Channels based on the display name which they are seeing on the teams client.
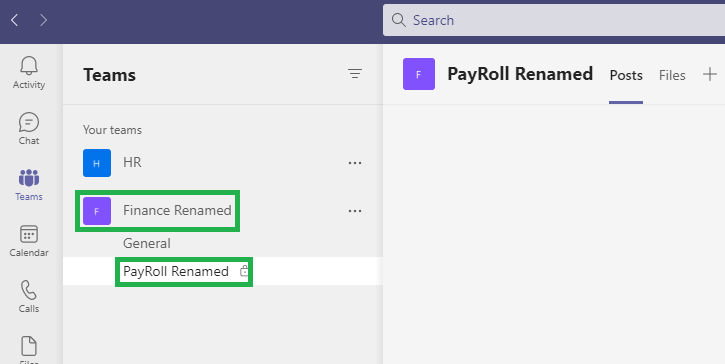
Refer this example to make this clear. We had a Team named Finance and a Private Channel named Payroll. Owner has renamed both as Finance Renamed and PayRoll Renamed. However, this change is only on the Display Name.
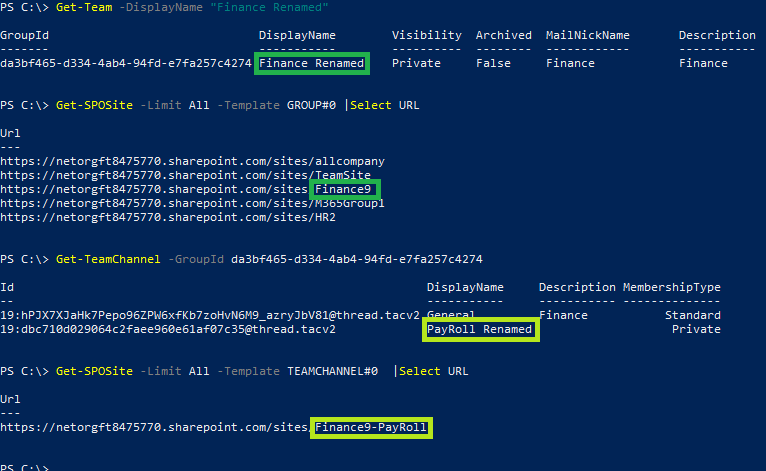
However on the target tenant, the URLs will be as Finance Renamed as the name used is source display name. On a similar note, Its not mandatory that SharePoint Site URL doesnt needs to be exactly
Hence, the URL pairs should be created with care and both URLs on each pair should be validated to be sure that its all good.
Now lets try to populate an input file and add to Mover. I am using an input file with incorrect URL to show how Mover will show the errors.

We can add the CSV file to Mover from Migration Options -> Add to migration option. Drag and drop the csv or use “Choose a file to Upload” button the upload the CSV.
Mover load the input file successfully. There is no validation at this stage if the URLs are accessible or not.
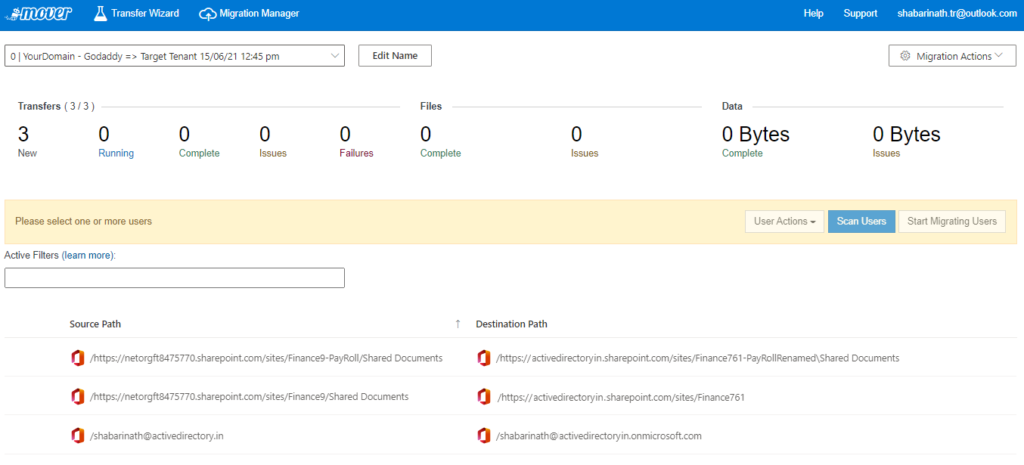
Once the input file is successfully loaded on Mover console, Select all items or individual items and then initiate a scan by clicking at “Scan User”. Scanning will look at the data on the source and populate the details on how many files, total volume of data etc.

Once scanning is successful, We can proceed with actual migration. Please note that migration can be started only for the items which scanning completed successfully.
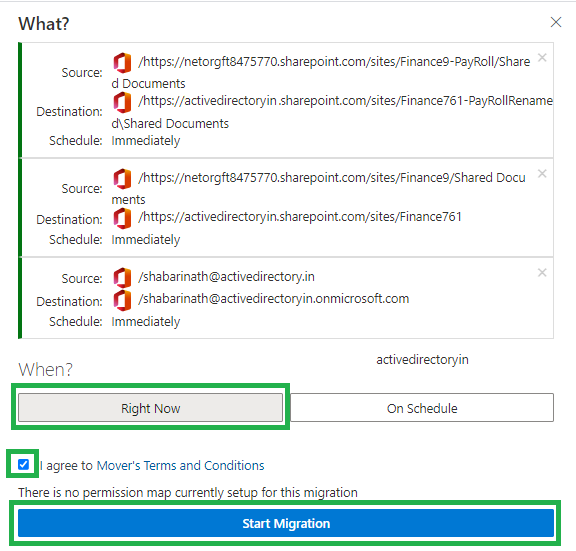
Once we click on Start Migration after accepting the Mover Terms and Conditions, It may take a while to start the job. The total time to complete the data transfer is based on the volume of data. And if the data is huge, It seems Microsoft has some kind of prioritization which can keep the jobs idle for few hours in between the data transfer progress. So give enough time for the data transfer job.
In the above sample, We have used an input file which has errors on the target SharePoint URL. Hence, the job failed at the time of migration.
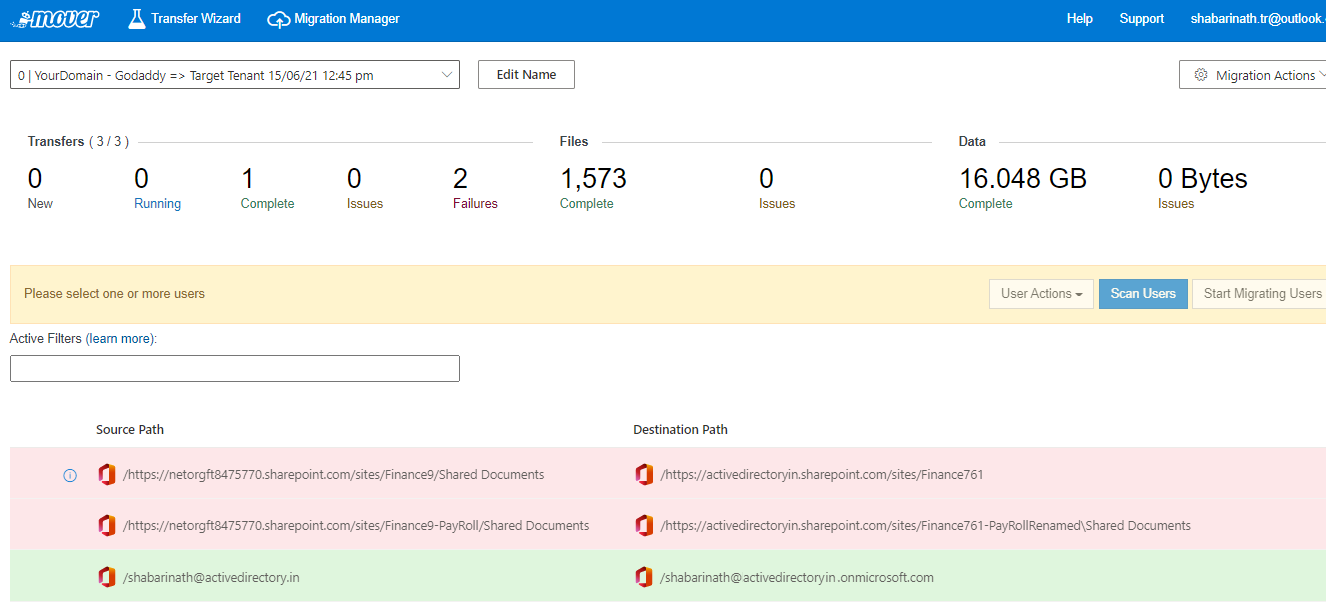
To view the detailed error, Double click on the item line which we need to verify.
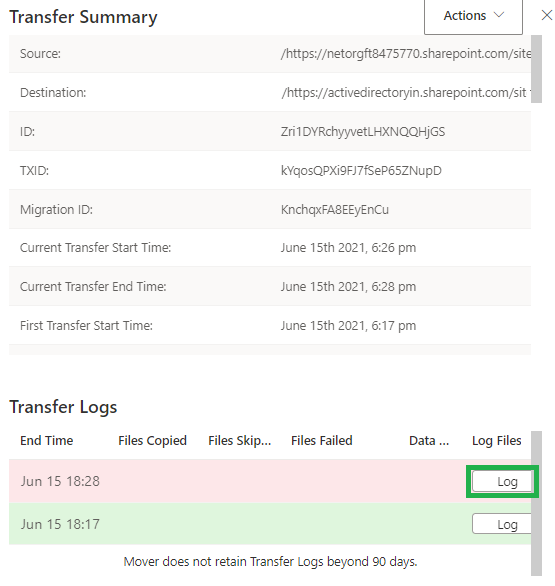
Click on the Log to get more details on the error message.
Permission Mapping
In this migration, Data is copied along with metadata. However, user objects in source and destination are different from a technical standpoint as the UPNs are different at this stage. Hence, We need to relay on Mover to map the permissions with the respective user/group objects on the target side.
For example, I have an ID in my source tenant as shabarinath@activedirectory.in. I also have a user ID created in target tenant as shabarinath@activedirectoryin.onmicrosoft.com. Mover needs to know that permissions for shabarinath@activedirectory.in needs to be replaced with shabarinath@actiedirectoryin.onmicrosoft.com. By this way, Permissions are retained on the target tenant. On the cutover day, the domain activedirectory.in will be detached from Godaddy tenant and will be added to the target tenant. At this stage, We will update the UPN of users to @activedirectory.in . Since the UPN changes will not affect the permissions in Active Directory or Azure Active Directory, we are good with that approach.
To map permission, Mover has two options. Either to use a mapping file or to do an auto discovery.
To Open Permission Map, Navigate to Migration Action -> Permission Map

Permission mapping will be blank while opening for the first time.
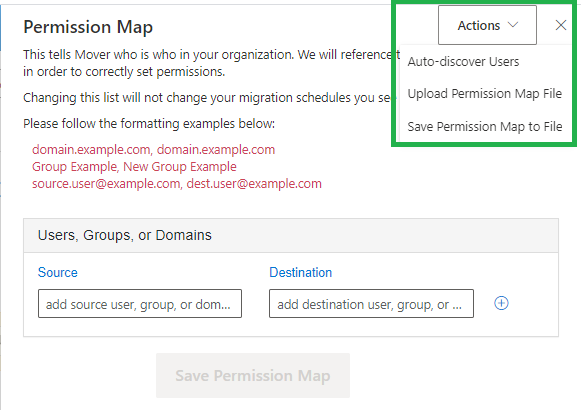
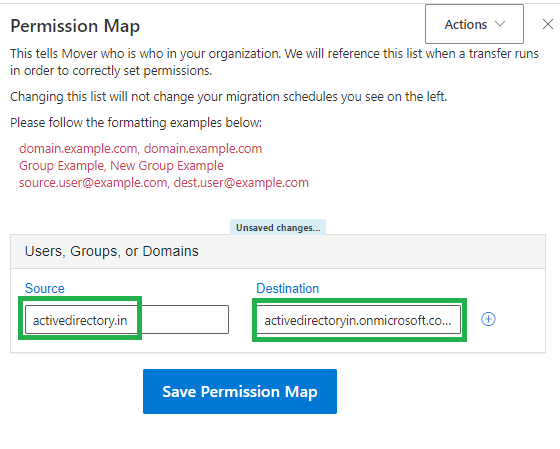
If object names are same and its just the domain name which are different – Adding a domain level mapping is enough in my experience. Else, Go for auto discovery and adjust the object pair prior to migration. For that, add source domain and destination domain (onmicrosoft.com domain). Click on the + symbol at the right next to the destination box.
Permission pair will be added to a new line and click on Save Permission Map button to save it.
Now, I have corrected the input file as below.

I have also updated the permission mapping. And initiated migration. Jobs completed successfully without errors.
