Using legacy agent, as discussed on the previous post is one option for configuring Windows servers for with Sentinel. As the name states, its a legacy option and has its own limitation. Last year, Microsoft came up with a new approach by making use of Azure Monitoring Agents. With this approach, the collected logs are sent to Azure Log Analytics Workspace, which is shared between Azure Monitoring as well as Microsoft Sentinel. The same data is also available for Microsoft Defender. As per Microsoft, all legacy agents currently in use will be replaced with Azure Monitoring Agent and the legacy agents are expected to retire on 31st Aug 2024.
Configuration is almost similar, when compared with the legacy agent installation. We need to do few more additional steps to complete the setup.
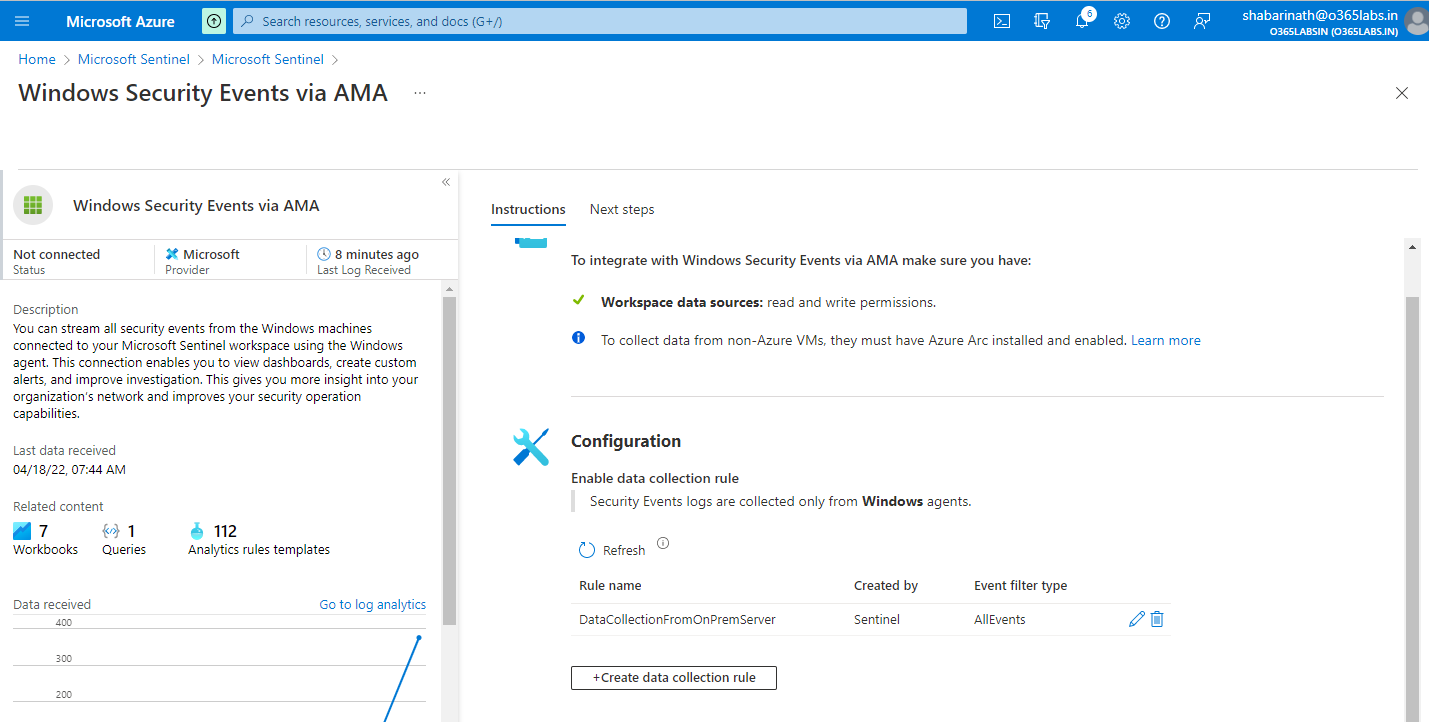
From the Sentinel Dashboard, Navigate to Data Connectors.
Search for “Windows Security Events via AMA” and select the connector from search result.
Click on Open Connector Page from the bottom right corner.
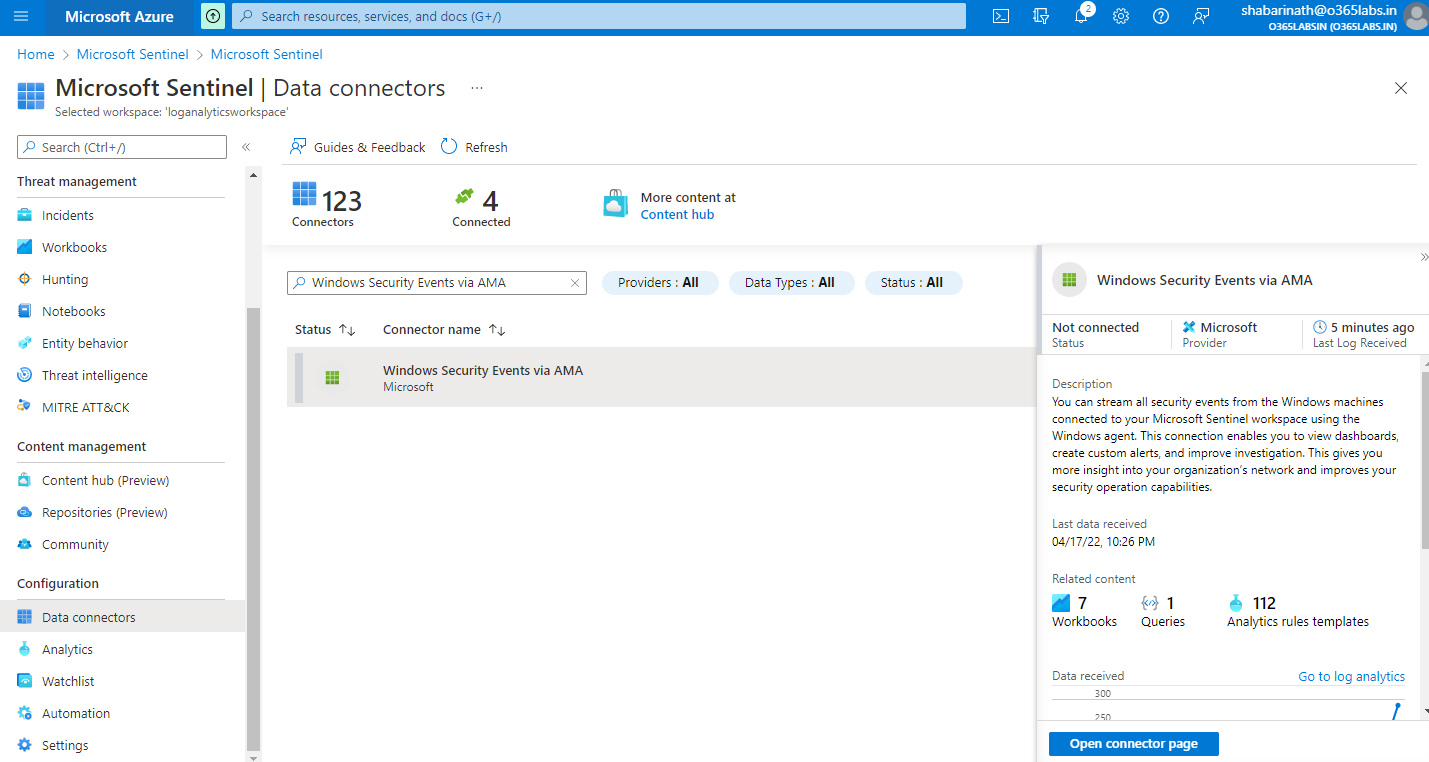
On the connector page, the difference compared to the legacy agent installation is that we don’t see any agent details. Instead, We have a messaged marked as an information which says that To collect data from non-azure VMs, they must have Azure Arc installed and enabled.
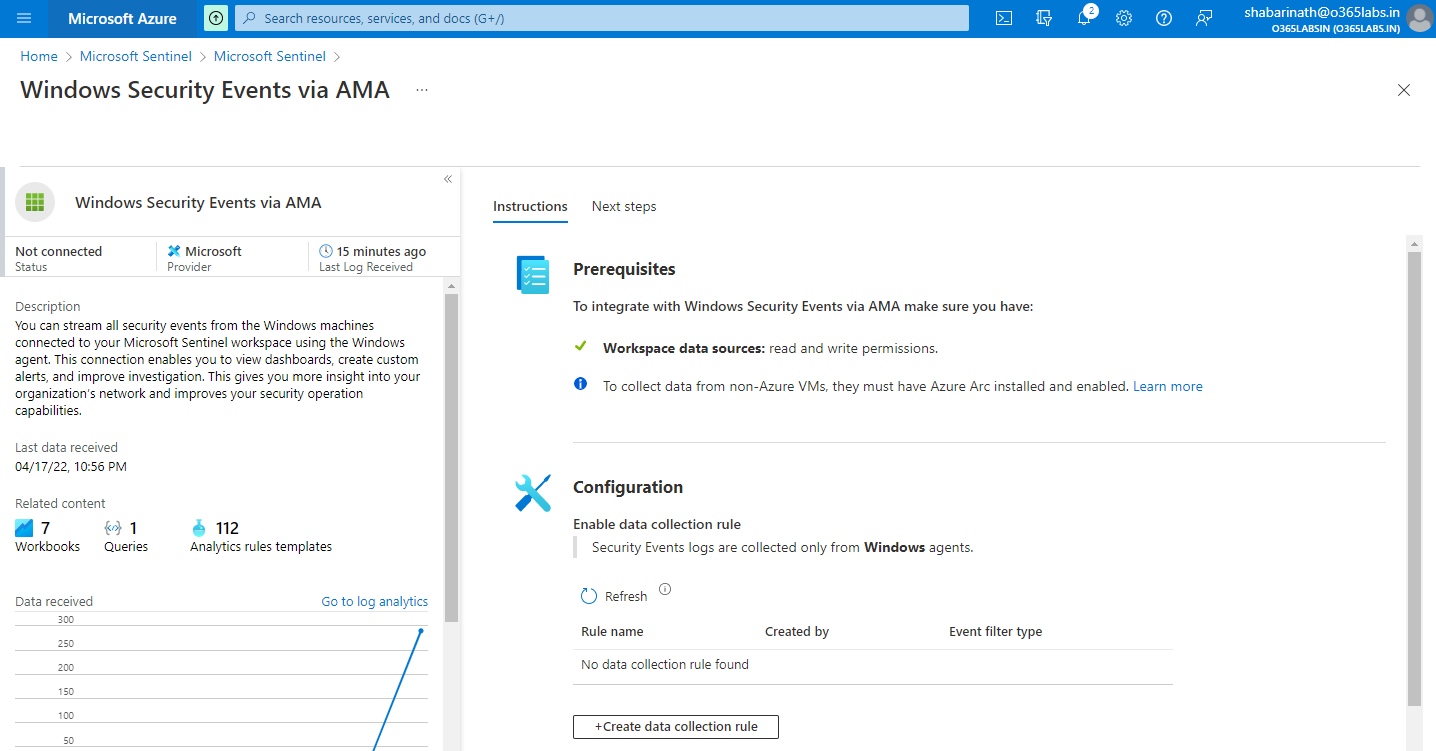
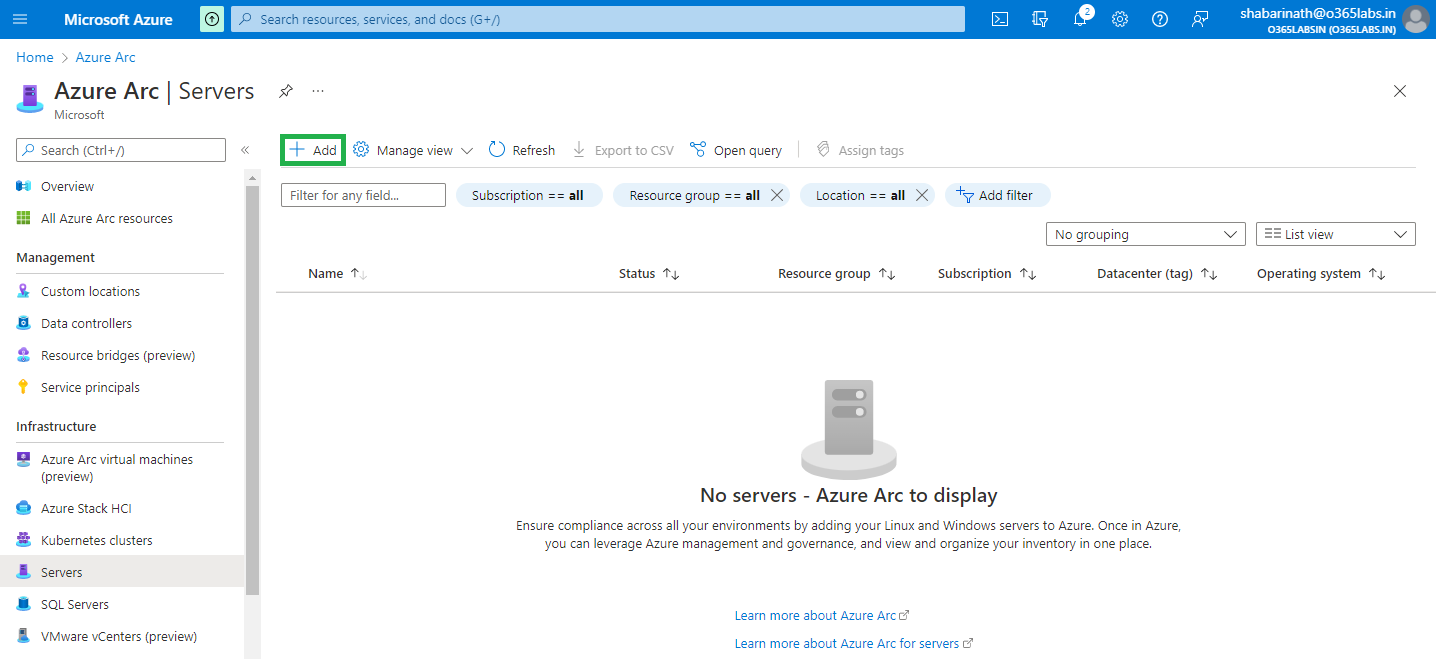
So we need to navigate to the Azure ARC portal. Azure Arc is a set of technologies that brings Azure security and cloud-native services to hybrid and multi cloud environments. From Azure Portal, search for “Azure ARC” and navigate to the Azure ARC portal. Select servers at the menu placed on left side.
Click on the + Add from the top menu.
Now, page will get redirected to “Add servers with Azure Arc”. This page has multiple options on deploying ARC Agent. The bottom-line is that “Azure Connected Agent” needs to get installed either manually or through script. Once installation is done, Need to get the agent connected to the Azure Tenant. If its a single server, Generate a script will help to create the script customized with the values specific to your environment.
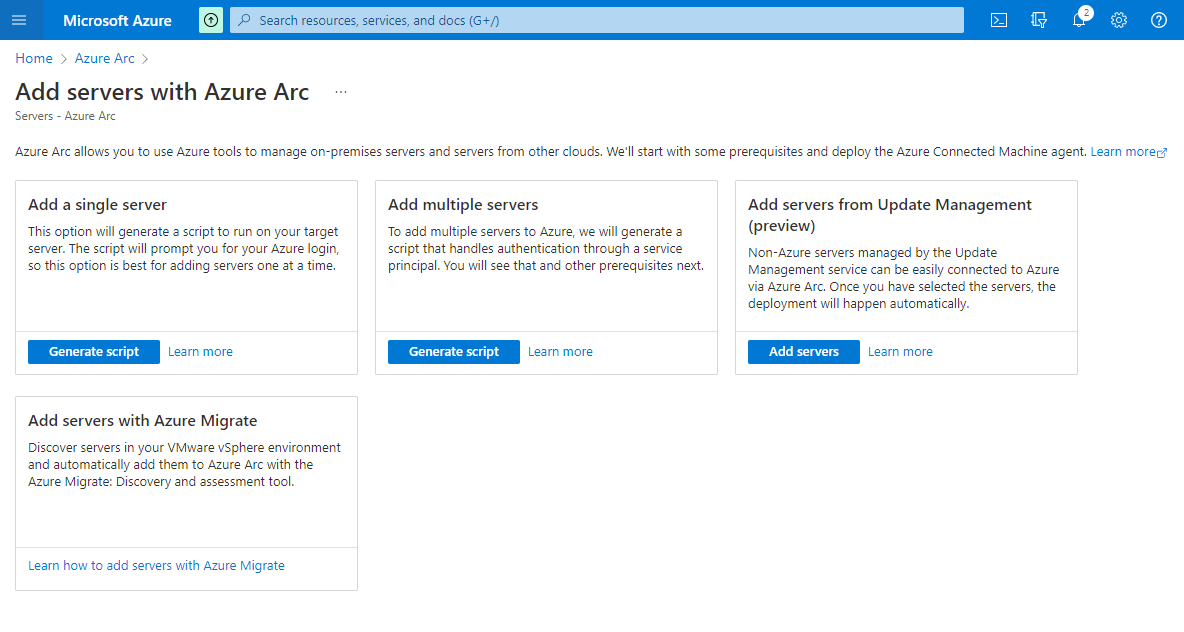
Navigate through the initial screens. The final page will generate the script as well as gives the option for registering the subscription.
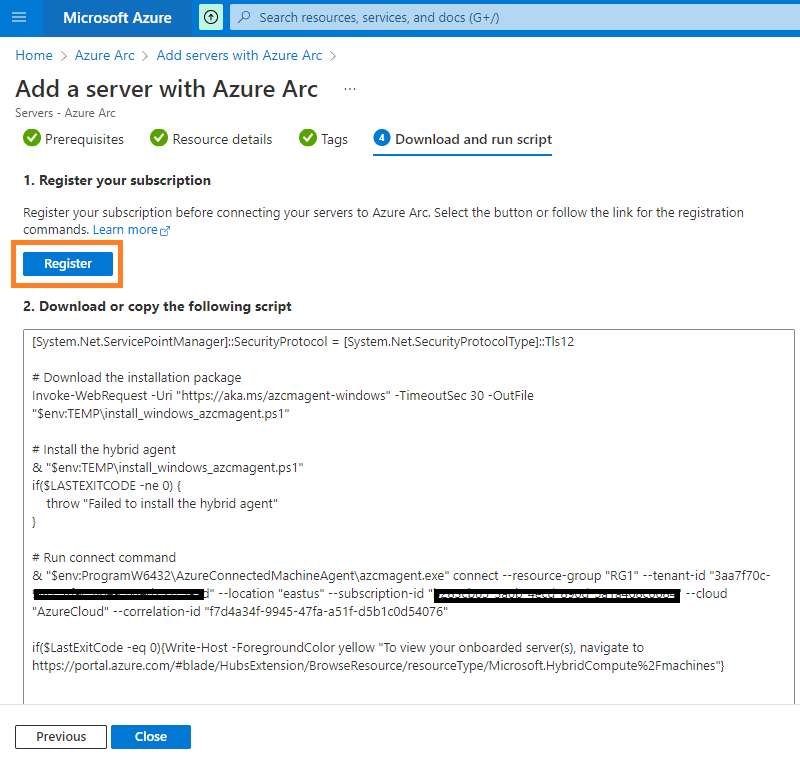
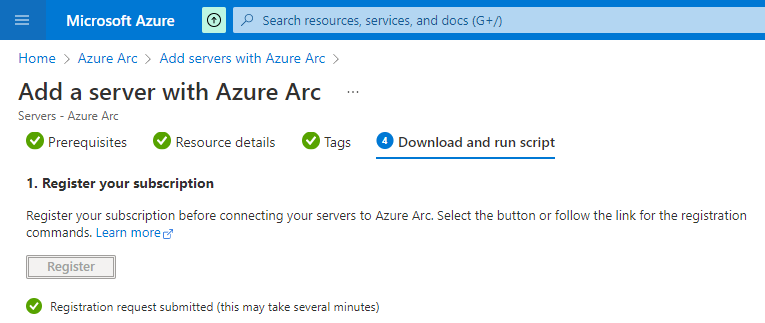
Registering is a one time activity. Just click on register and thats it.
Now, Copy the script and run it from the onprem server.
This script will do the following :
- Download the agent from the Microsoft Download Center.
- Install the agent on the server.
- Create the Azure Arc-enabled server resource and associate it with the agent.
https://aka.ms/AzureConnectedMachineAgentIf internet connectivity is not available from the server, get the msi installer downloaded first from here and get them copied to the respective onprem servers. The actual registration is happening by running azcmagent.exe, which is located in C:\Program Files\AzureConnectedMachineAgent. Extract that part alone and can do a manual installation if that’s required.
Running the script from PowerShell console is easy.
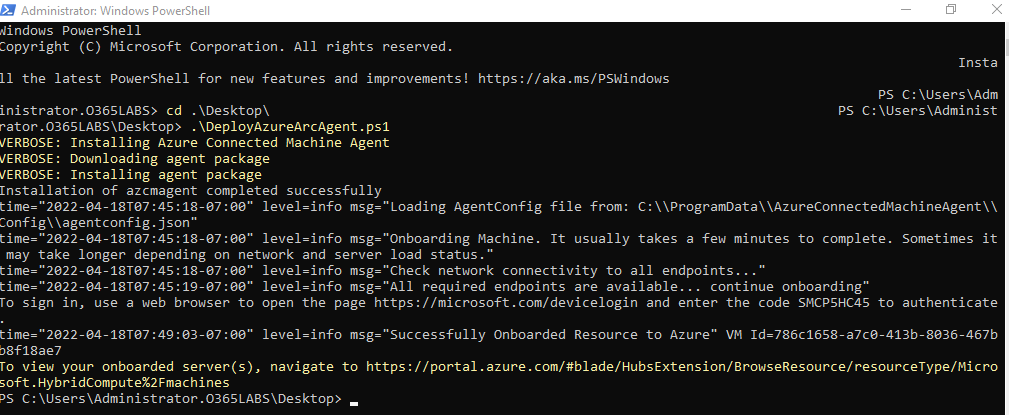
The script will halt in the middle to complete the device login and once authenticated, We can get the rules configured on Azure Sentinel.
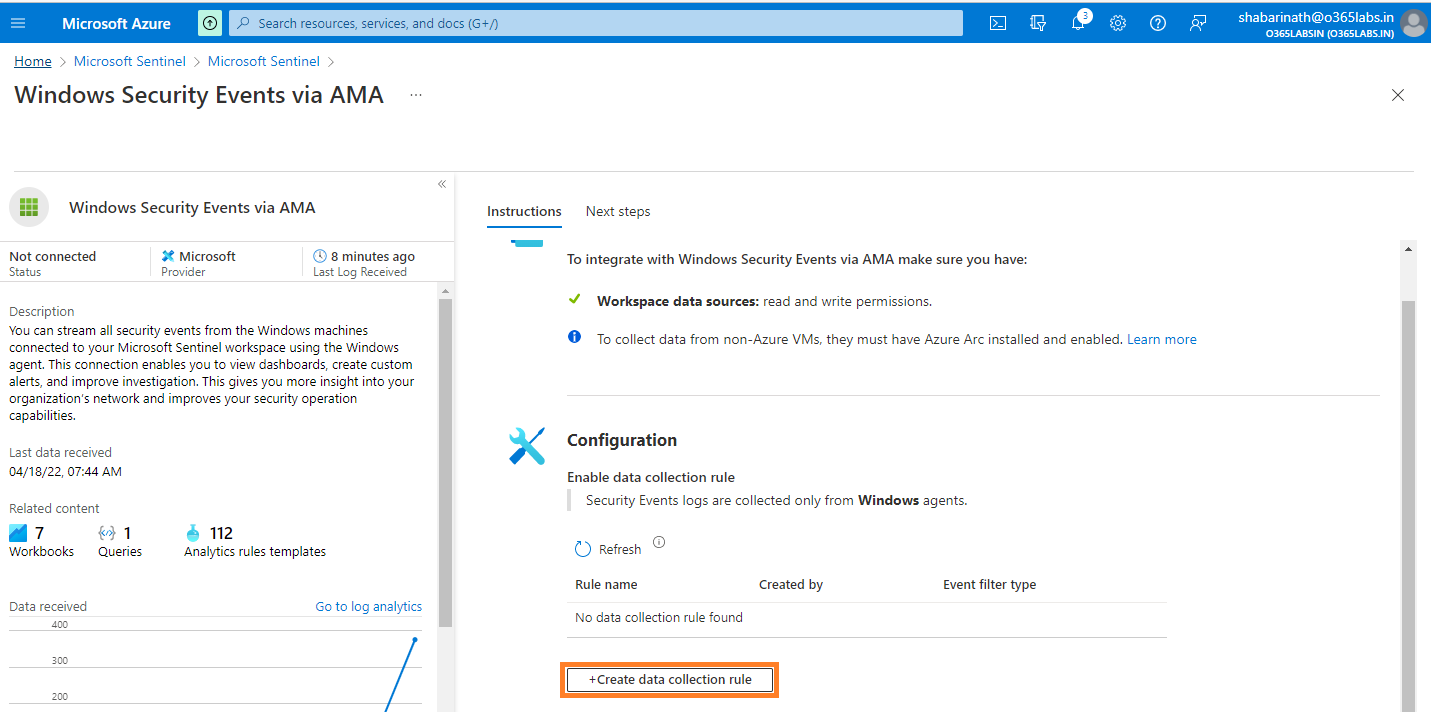
Navigate to Azure Portal -> Sentinel -> Data Connectors -> Windows Security Events via AMA
Click on Open Connector page at the bottom right corner
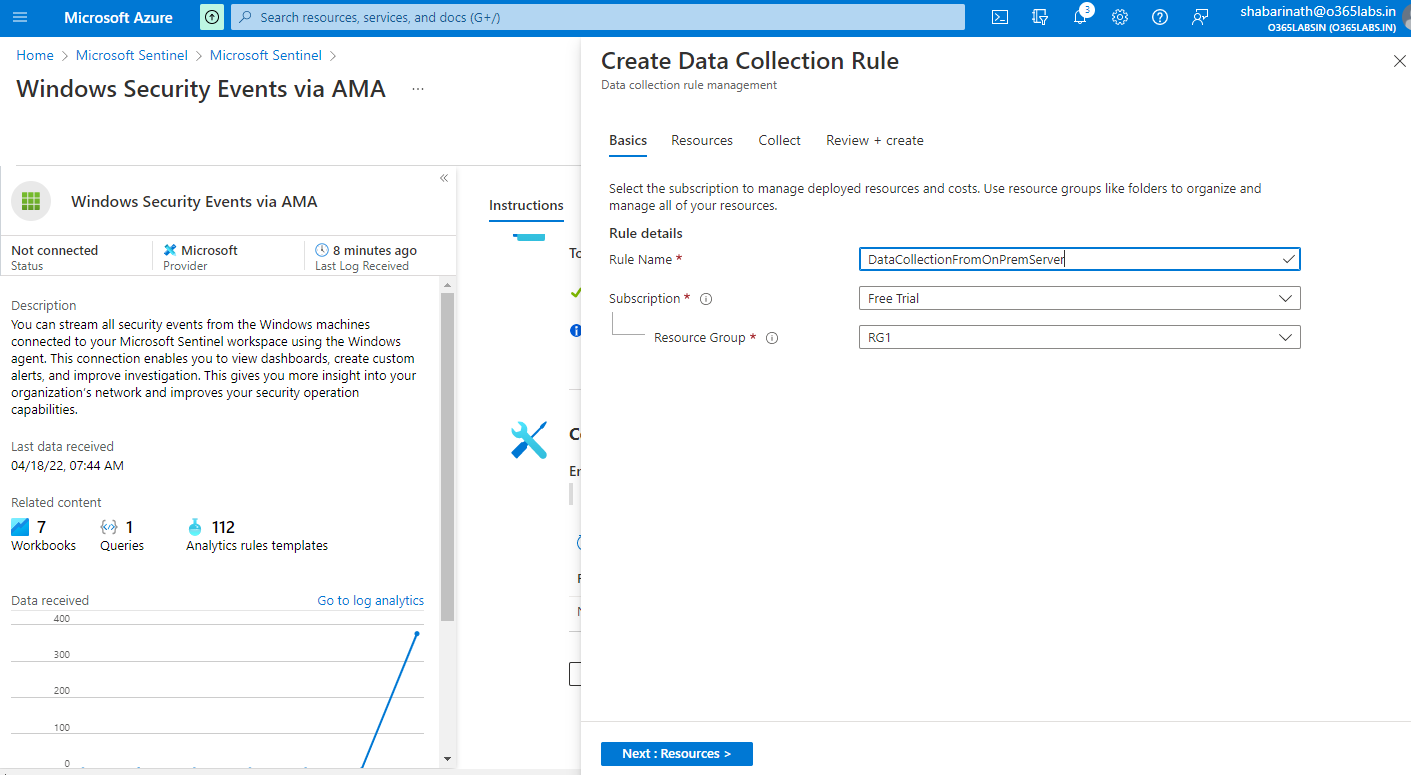
Click on “+Create data collection rule” on the configuration
Enter the Rule Name, Subscription and Resource Group.
Click on Next
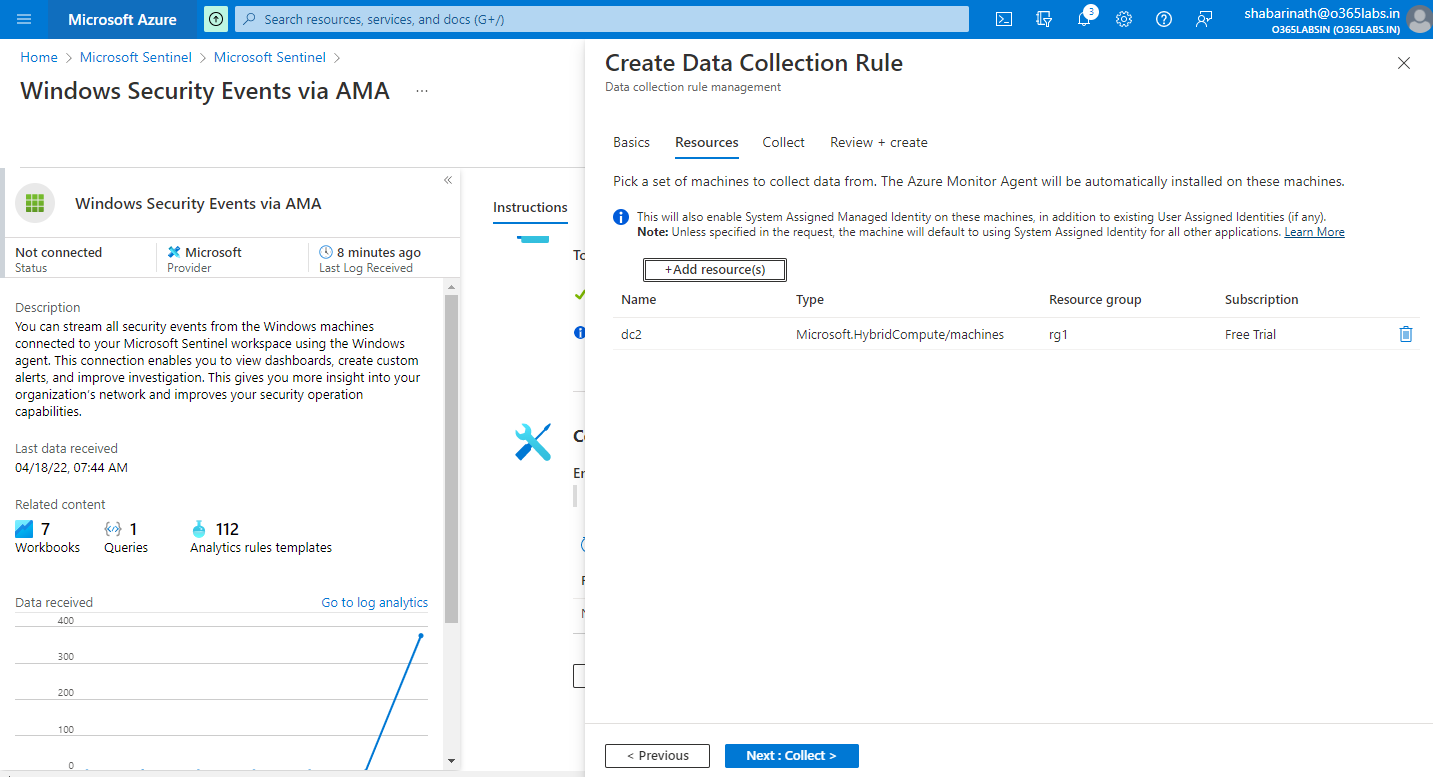
On the resources page, select the onprem computer
Click on Next
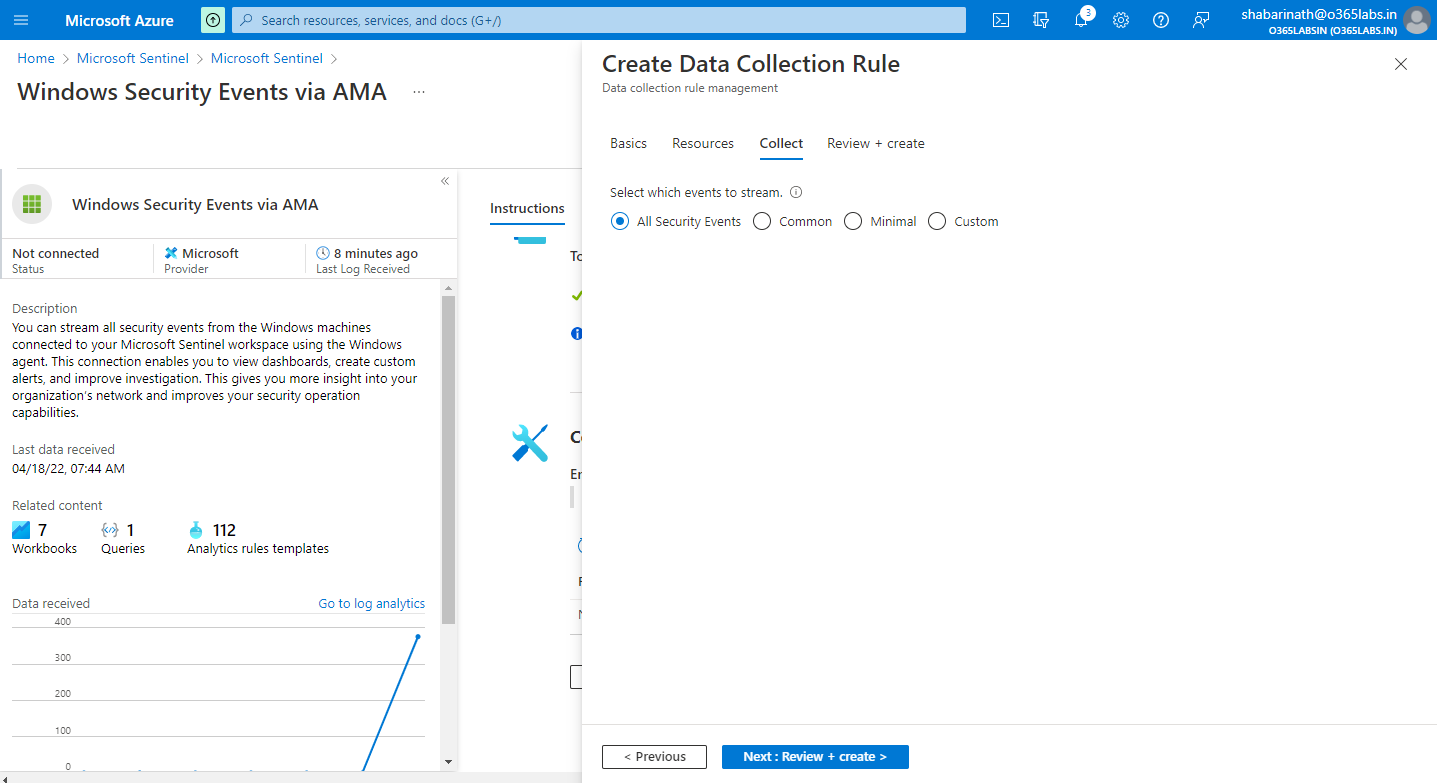
Select the events to stream.
Complete the validation and go ahead with creation
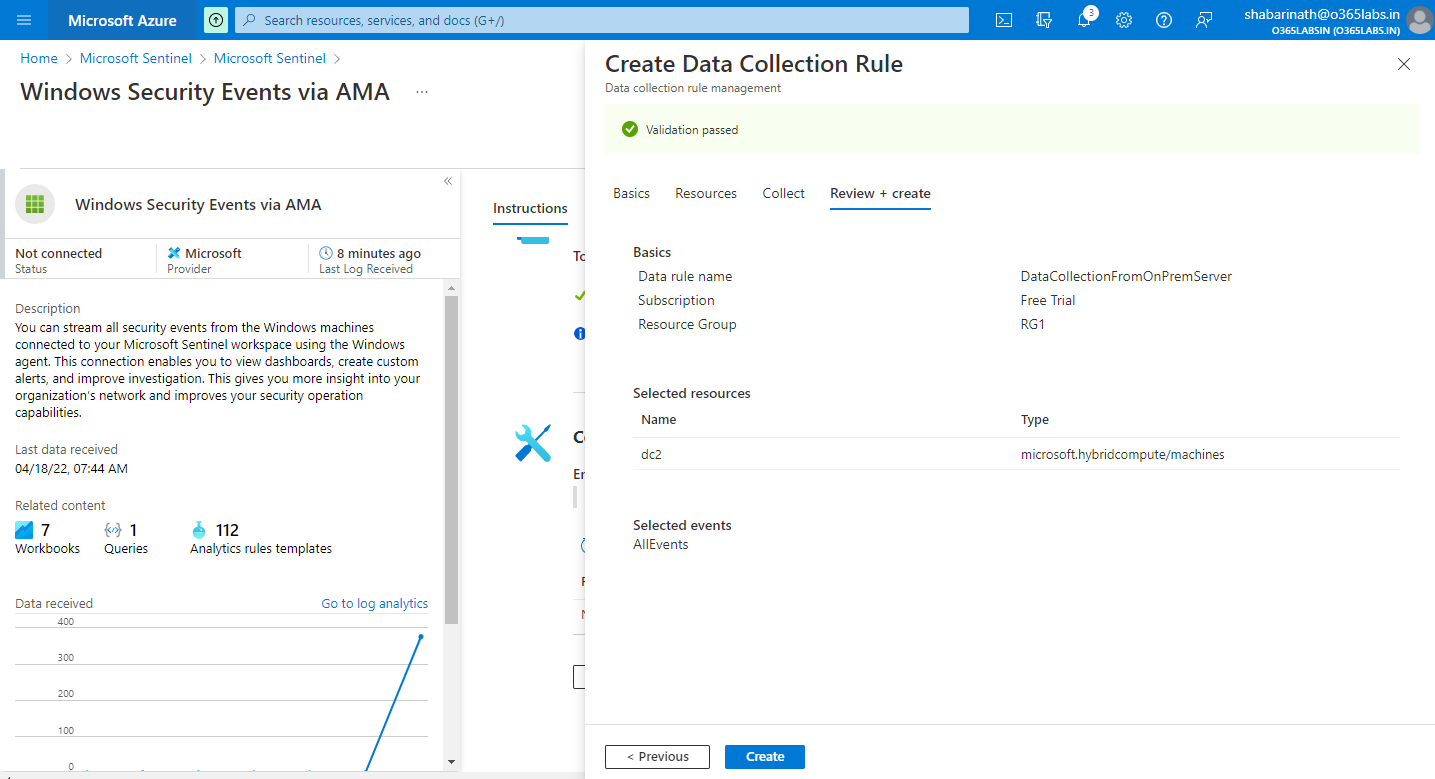
The new data collection rule will be visible on the configuration section
Events will start populating after a while.
Good luck !